Applying Utility Classes
Our standard themes include CSS utility classes that can be applied to widget containers, links, or text to alter the appearance. This technique is available for advanced users who want more control over the page appearance and are comfortable looking at small code snippets.
Button classes (for links)
This will make a link look like a button, which is useful for calls to action that should be visually prominent. Gamma theme does not have a tertiary button color since it only has a single accent color.
- Default button: button (black)
- White button: button button--white (white)
- Primary button: button button--primary (primary branding color)
- Secondary button: button button--secondary (secondary branding color)
- Tertiary button: button button--tertiary (tertiary branding color, if set)
To add these classes to a link:
- Create a text link (learn about adding links)
- In the WYSIWYG/text editor, view the HTML view by selecting the "Source" button.
- Add a class attribute with your desired class names to the link element <a> tag, for example:
<a class="button button--primary" data-url="http://example.com" href="http://example.com">My link text</a> - Save and view the changes.
Text classes (for text)
Changes the color of the text. Use sparingly. We do not recommend altering the color of headings or using the same color that is used for links as a color for plain text. Gamma theme only supports white text and secondary text since the primary background is black.
- White text: text-white (white)
- Primary text: text-primary (primary branding color)
- Secondary text: text-secondary (secondary branding color)
- Tertiary text: text-tertiary (tertiary branding color, if set)
To add these classes to text:
- Type the text.
- In the WYSIWYG/text editor, view the HTML view by selecting the "Source" button.
- Add a class attribute with your desired class names to the paragraph element <p> tag, for example:
<p class="text-primary">My paragraph with primary colored text.</p> - Save and view the changes.
The classes can also be added to other tags that contain text, such as <div> or <span> tags.
Background classes (for widgets)
Applies a background color to a widget and changes text and link colors to match. Gamma theme only supports white background and secondary background since the primary background is black.
- White background: bg-white (white)
- Default theme background: bg-theme (generally a light gray)
- Primary background: bg-primary (primary branding color)
- Secondary background: bg-secondary (secondary branding color)
- Tertiary background: bg-tertiary (tertiary branding color, if set)
Layout classes (for widgets)
- Full width: w-full (allows for section to go full width)
- Medium width: w-medium (constrains section to 1024px with auto margins)
- Block contain: block-contain (should be used with w-full or w-medium to center content)
To create a narrower column of text within a full-width colored background area (for example, w-full bg-primary), you can add the following classes:
- Content full: c-full (constrain content based on the theme's container width, which varies per theme)
- Content large: c-large (constrain content based on the desktop breakpoint)
- Content medium: c-medium (constrain content to the laptop breakpoint)
- Content small: c-small (constrain content to the tablet breakpoint)
Border classes (for widgets)
Applies a thin top border. Useful for creating visual separation or adding an accent color between text widgets. Gamma theme only supports secondary color border and white border since the primary background is black.
- Primary color border: border-top-primary
- Secondary color border: border-top-secondary
- Tertiary color border: border-top-tertiary
- Black border border: border-top-black
- White border (for use with dark backgrounds): border-top-white
Spacing classes (for widgets)
Applies both top and bottom padding, generally used when applying a background color.
- space-y-10 (top and bottom padding of 20px)
- space-y-20 (top and bottom padding of 40px)
Applies bottom margin (increasing by incremental of 4).
- mb-2 (8px)
- mb-3 (12px)
- mb-4 (16px)
- mb-5 (20px)
- mb-6 (24px)
- mb-7 (28px)
- mb-8 (32px)
- mb-9 (36px)
- mb-10 (40px)
To add these classes to a widget container:
1. Edit the widget.
2. The custom class name field appears at the bottom of a widget form. Add css classes in the field. Separate multiple class names with a space.

3. Save and view changes.
This feature is available in the following widgets:
- Accordion
- Column
- Custom Text/HTML widget
- Embed Media widget
- Featured Posts
- List of Files
- List of Posts
- Random widget
- Slider widget
- Tabs
- Taxonomy widget
Altering the Styling of a Page Element
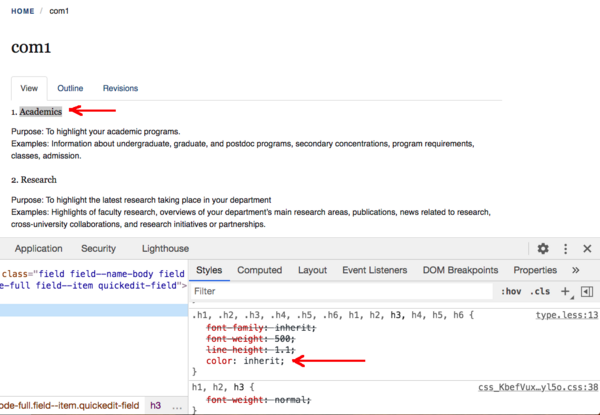
You can add custom CSS for any HTML element to override the styles defined in your theme.
1. Find the element that you'd like to change. Example: an H2 tag ("Quick Links")
2. Use your browsers developer tool panel to inspect the element and find the correct selector
3. Create an Embed Media Widget and add appropriate code in the Web Tab
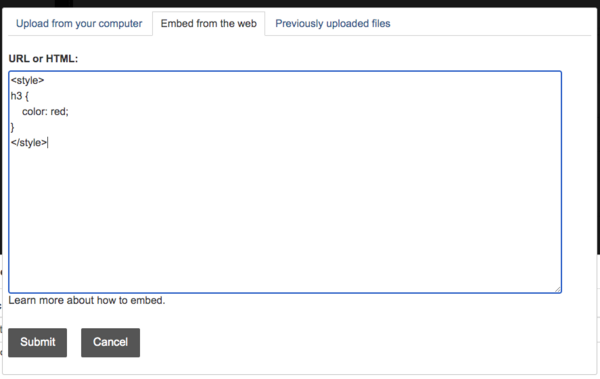
4. Add Embed Media Widget to Layout of the page (any location)
5. Save Layout
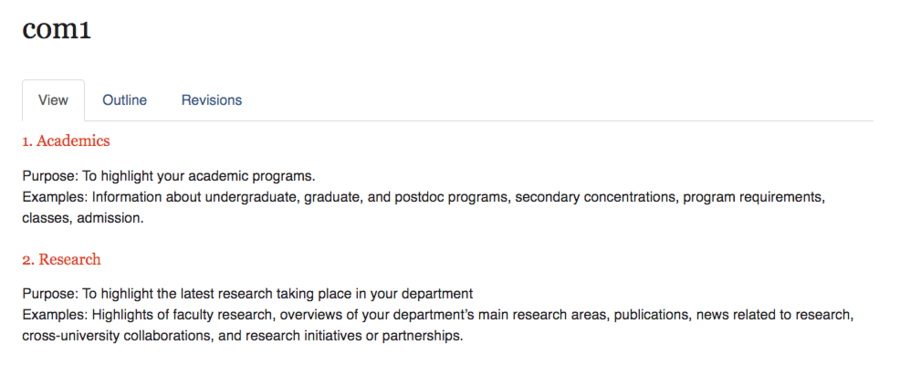
After applying the custom css, the H3 headers becomes red in color.
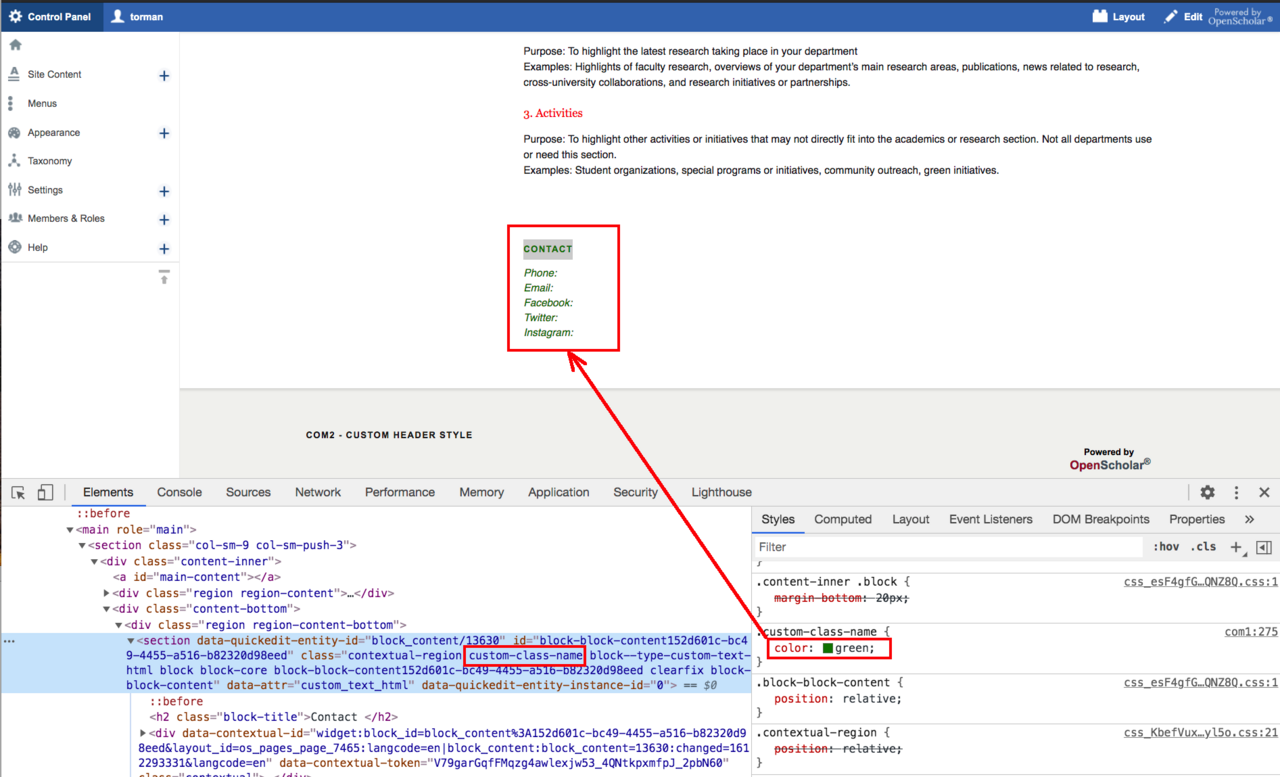
Add Custom CSS Class to Widget Container
Custom CSS classes can be created and applied to the markup of a widget’s outer container. The class names can then be used as selectors in a custom theme. This feature is available in the same widgets listed above in the instructions about adding utility classes.
1. Edit the widget.
2. The custom class name field appears at the bottom of a widget form. Add CSS classes in the field.
3. Define CSS rules for the custom CSS class in an Embed Media widget and place the Embed Media widget to the same layout where the widget resides on.
For example: a rule of css which sets text color to green
<style>
.custom-class-name {
    color: green;
}
</style>
4. Custom class name(s) in the markup